
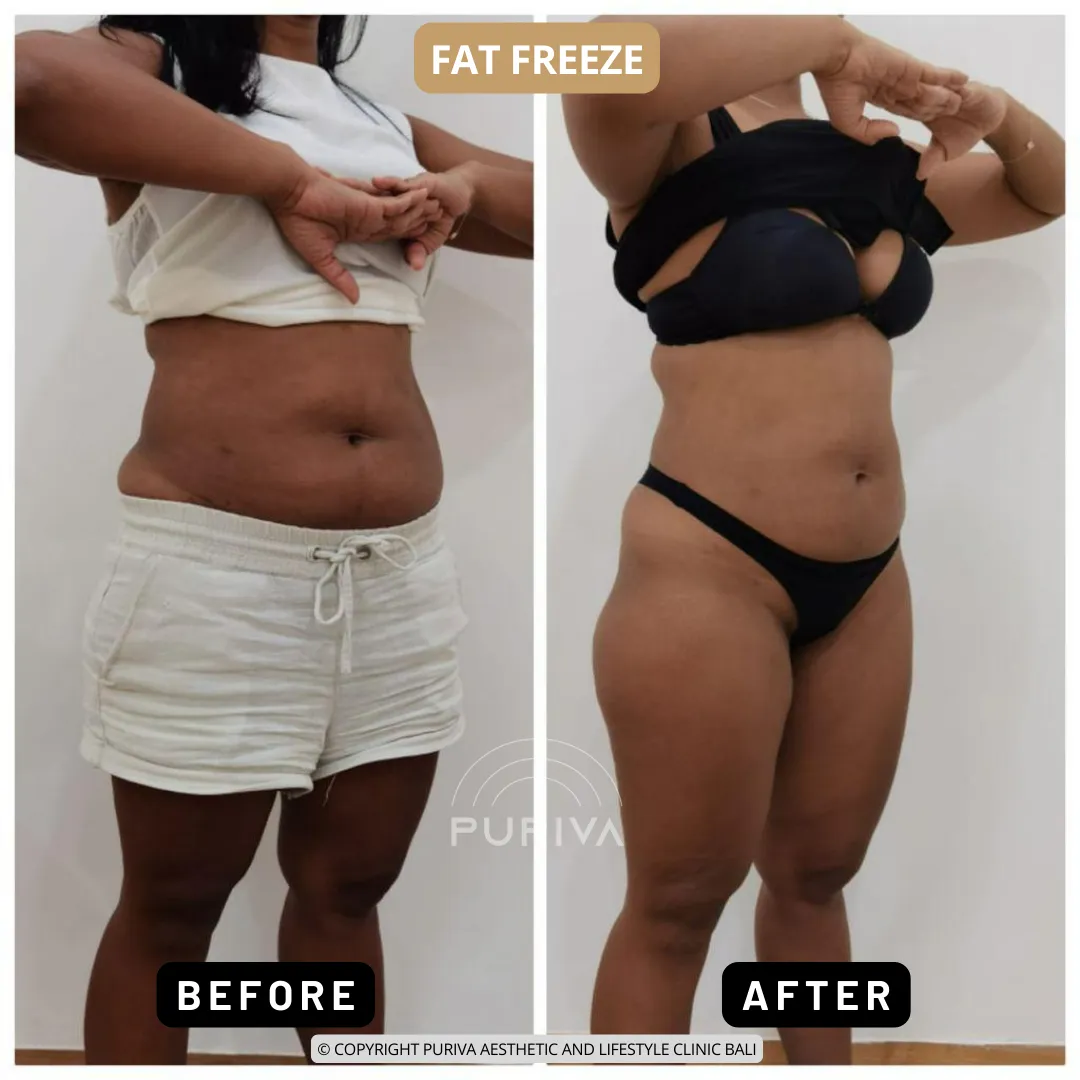
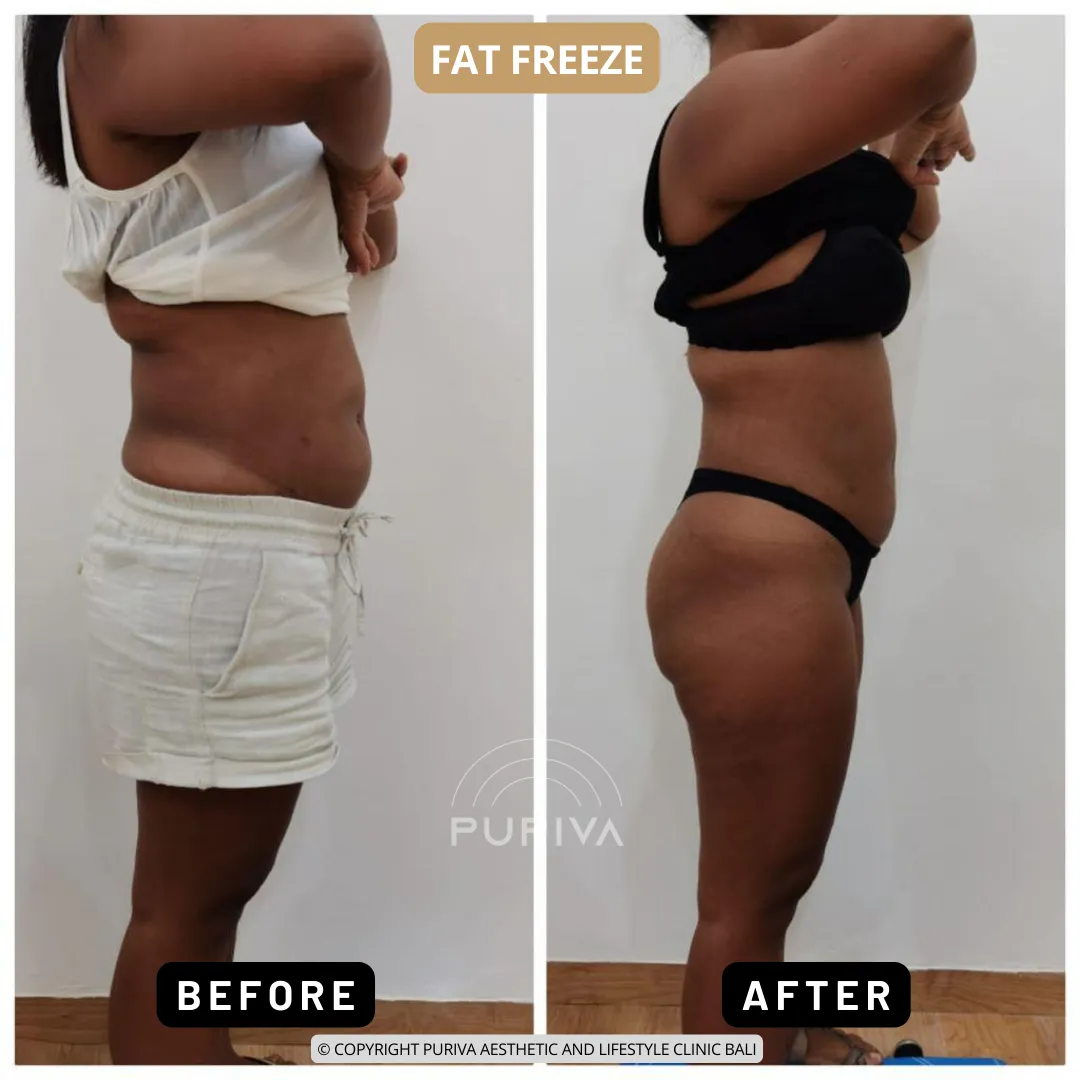
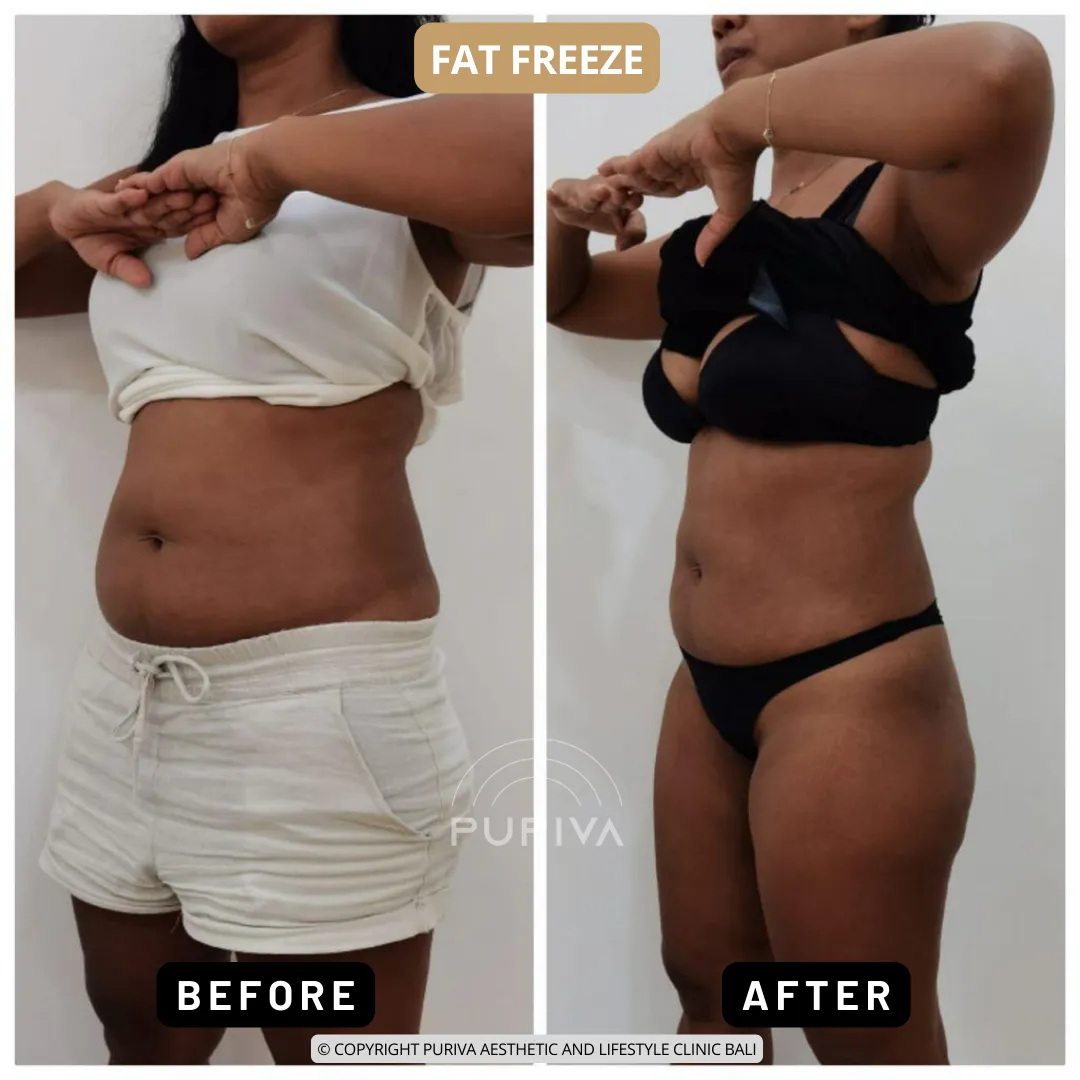
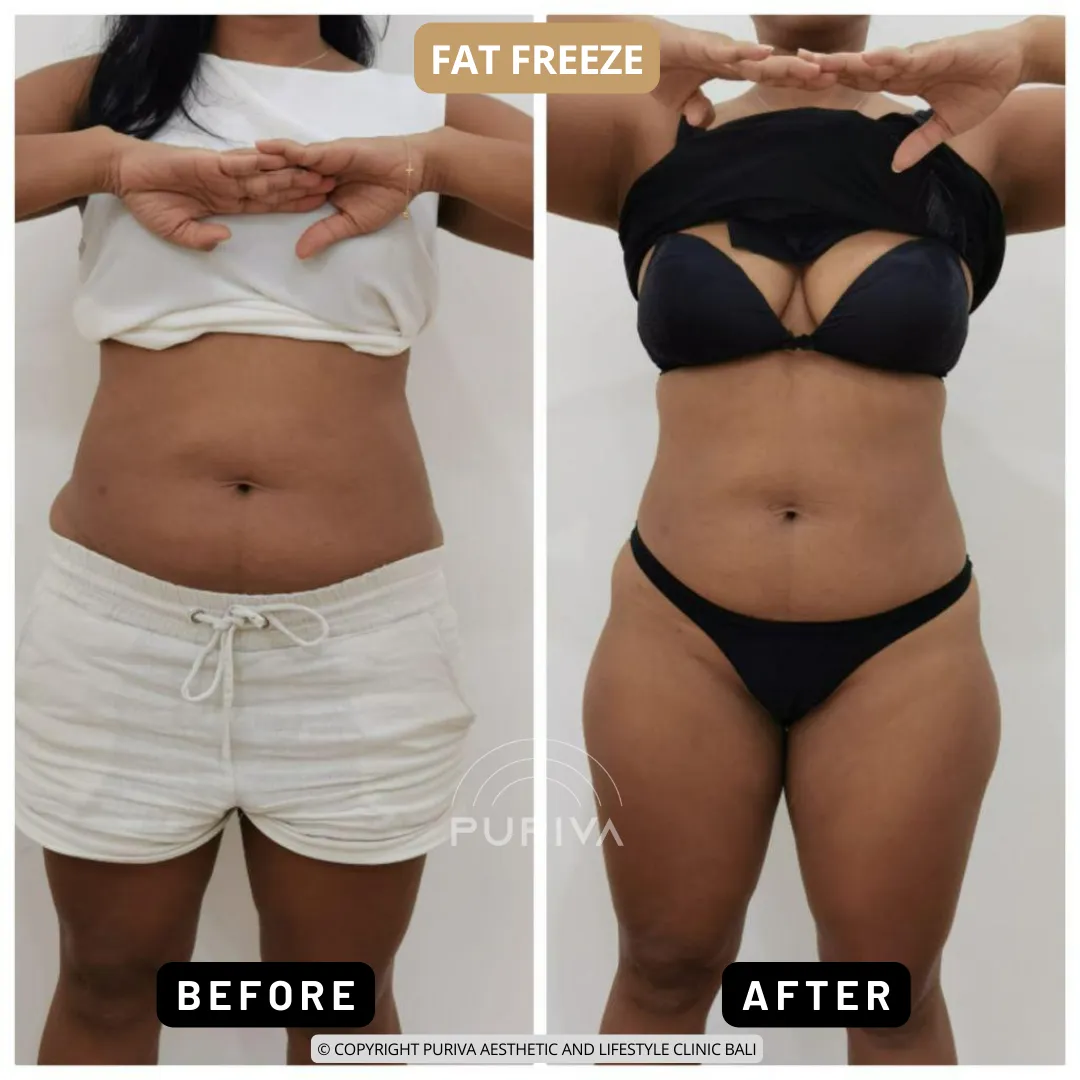
Before and after cryolipolysis pictures of real patient
Here’s a step-by-step explanation of how fat freezing works:
- Assessment and Planning: Before the procedure, a qualified medical professional assesses the patient’s areas of concern and determines whether they are suitable candidates for fat freezing. This assessment helps in creating a treatment plan tailored to the patient’s specific needs.
- Applicator Placement: During the procedure, the targeted area is marked, and a specialized applicator is positioned on the skin surface. The applicator creates a vacuum effect, gently drawing the fatty tissue between cooling panels.
- Controlled Cooling: Once the applicator is in place, it starts to deliver controlled cooling to the targeted area. The cooling temperature is carefully regulated to reach a level that is sufficient to damage the fat cells but not low enough to cause harm to other tissues.
- Apoptosis of Fat Cells: Fat cells are more sensitive to cold temperatures than other cells in the body. When exposed to the controlled cooling, the fat cells crystallize and undergo apoptosis, a natural cell death process.
- Inflammatory Response: After the fat cells are damaged, the body’s immune system is triggered, and an inflammatory response is initiated. This response helps to gradually break down the damaged fat cells.
- Elimination of Fat Cells: Over the following weeks and months, the body’s lymphatic system works to eliminate the damaged fat cells. They are gradually processed and removed from the body through the liver and excreted as waste.
- Results: As the body metabolizes and eliminates the fat cells, the treated area typically experiences a reduction in fat volume. Patients may start noticing visible results a few weeks after the treatment, with full results becoming apparent within a few months.


